Xlib basics
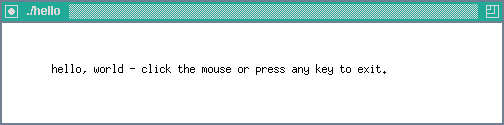
This note explores the basics of Xlib. It covers enough to open a window, configure it, display a message, respond to some events, and close it gracefully - see figure 1 for a hint at what this will look like.
Why xlib? Well, because we can, because it is the lowest level above the X protocol (sending bits around), and because, contrary to many espoused beliefs these days, knowing how to do something the ‘hard way’ helps you understand what’s going on with the ‘easy way’… and when things inevitably go wrong, you want to have a clue.
Figure 1. A Basic Xlib Application
Disclosure - I am not an expert in X. These notes represent my stumbling around trying to figure things out. If you know better, drop me a line and I’ll probably make an adjustment.
First things first, old books and old notes are fantastic, but don’t expect things to work as they describe all of the time. This note is written in 2023 and the exploration it unveils is specific to the times and environment of the author. Sure, a lot of it should translate to other times and environments, but at least keep it mind.
Systems tested
- MacPro and Macbook Pro running MacOS Mojave 10.14.6 (tested with XQuartz and macports X11)
- Dell Optiplex 755 running FreeBSD 13.1
- IBM ThinkCentre M92p running FreeBSD 13.1
- Lenovo Thinkpad T430 running Debian Bullseye 11.6
Some Resources
- XQuartz - https://www.xquartz.org
- XQuartz Developer Information - https://www.xquartz.org/Developer-Info.html
- MacPorts - https://www.macports.org/install.php
- X.org Foundation - https://www.x.org/wiki
- Xlib - C Language X Interface https://www.x.org/docs/X11/xlib.pdf
- The source code for the program developed in this note is available here
A bibliography
- Foster-Johnson, E. & Reichard, K. (1992). X Window Applications Programming, 2nd ed. New York: MIS Press.
- Nye, A. (1995). Xlib Programming Manual for Version 11 R4/R5, 3rd ed. Vol. 1 in series The Definitive Guides to the X Window System. O’Reilly & Associates.
- Nye, A. (1993). Xlib Reference Manual for Version 11 R4/R5, 3rd ed.. Vol. 2 in series The Definitive Guides to the X Window System. O’Reilly & Associates.
- Quercia, V., & O’Reilly, T. (1993). X Window System Users’s Guide for X11 Release 5. Vol. 3 in series The Definitive Guides to the X Window System. O’Reilly & Associates.
Acknowledgements
This note wouldn’t be possible without the great work of the folks who created X and those who maintain it to this day. I am appreciative of those efforts and you should be too :). The O’Reilly series of books, The Definitive Guides to the X Window System are the basis of much of my learned knowledge about X and how it works. Eric F. Johnson’s book, X Window Applications Programming, inspired the approach that I have taken to developing applications for X.
Without further ado, let’s get into it.
Outline of what we are about to do
In this note, I will walk you through writing some code that will:
- Declare some variables
- Open a connection to the X Window Server
- Open a window
- Set some hints
- Display the window
- Handle events
- Close the Display
There are some terms we need to get out of the way before proceeding. Specifically, what is a server, display, screen, window manager, window, and client?
Unfortunately, techies write reams about these things and make lots of distinctions that cloud the issue for beginners. Here’s what the modern, beginning reader needs to know about their world:
-
Server, display, and screen - the X window server is a process that is most likely running on your local machine. It manages communication with the hardware that is attached to your machine, specifically the monitor(s), mice, and keyboard(s). X considers each monitor to be a screen and all of them together as a display.
-
Window manager - the window manager is a process that controls the look and feel of your UI - window borders, title bars, buttons that decorate windows, etc.
-
Window - this is just a rectangular (usually) area of the screen.
-
Client - the applications we write and the window manager are considered clients of the X window server.
Whew! With those prelimaries out of the way, we can start designing our client.
Designing an X client (x windows application)
The trick here is to decide what the app’s going to do and then come up with a plan of writing it, building it, testing it, and deploying it.
What is the client going to do?
This application is going to display the string “hello, world - click the mouse or press any key to exit.” in a window and wait for the user to press a mouse button or a key before exiting.
What’s the plan to writing it?
In this project, we will just need two files, a hello.c file and a makefile.
- hello.c will contain our working code
- makefile will contain instructions related to building, running, and cleaning up our project.
The plan is to write the makefile first and then to write the code incrementally, adding some working code, running it, and writing some more code, until it works the way we want it to. Each time we add something it will follow the outline of steps given above.
But first, we will explore the environment so that we know where our libraries and include files live that are needed for the development.
Explore the environment
Open up a terminal in your x windows environment.
Find out where X lives. X is the X window server and if you are running X, you have one. But where is it? The easiest way to find it is to use which:
which X
/opt/X11/bin/X
This is on a Mac, FreeBSD says it’s in /usr/local/bin and Debian says it’s in /usr/bin. Knowing where X lives gives us an indication of where the libraries and include files are. Withouth them we won’t be able to compile or link the binary of the program we are creating and it just won’t run.
To find the libraries, we can use the information we obtained to find X. In this case, we will use /opt as the starting point for searches on MacOS. On FreeBSD, /usr/local, and on Debian, /usr.
find /opt -iname "*libx11*"
/opt/local/lib/libX11.dylib
/opt/local/lib/libX11-xcb.a
/opt/local/lib/libX11.6.dylib
/opt/local/lib/libX11-xcb.1.dylib
/opt/local/lib/libX11.a
/opt/local/lib/libX11-xcb.dylib
...
Similarly, to find the include files, search using the same root:
find /opt/local | grep "Xlib.h"
/opt/local/include/X11/Xlib.h
With the library directory and include directory known, we almost have enough information to start building X programs. The only missing piece at this point is knowing which libraries to link to. For this, we will use a package called pkgconf or somesuch and a program called pkg-config. To get the package, just use your pkg manager to install it:
On MacOS - port install pkgconf or brew install pkgconf, on FreeBSD - pkg install config, on Debian apt install pkgconf, etc.
Once you have pkgconf installed, you can use pkg-config to tell you what cflags and ldflags you need to build programs:
On MacOS
pkg-config --cflags --libs x11
-I/opt/local/include -L/opt/local/lib -lX11
On FreeBSD
pkg-config --cflags --libs x11
-I/usr/local/include -D_THREAD_SAFE -pthread -L/usr/local/lib -lX11
On Debian
pkg-config --cflags --libs x11
-lX11
With the location of the libraries and include files, the c flags, and linker flags handy, we have enough information to compile and link our own X programs.
Let’s put that information to good use.
Write a makefile
After you build and run a bunch of programs over and over, you will come to appreciate having a makefile. I suggest that you type it in until you have some muscle memory. Once you’re comfortable with making makefiles, your programming life will be much simpler.
Based on what we know from the previous section combined with some make magic, we can build a great makefile.
Stuff we need to know:
- cc is the standard command to invoke a c compiler on all of these systems (on MacOS and FreeBSD, it symlinks to clang, on Debian, it symlinks to gcc).
- CFLAGS - these are options to the c compiler
- LDFLAGS - these are options to the linker
This is our makefile built from what we have learned about the environment (for MacOS, your environment may need the flags variables to be tweaked appropriately):
CC = cc
CFLAGS = -I/opt/local/include
LDFLAGS = -L/opt/local/lib -lX11
OBJFILES = hello.o
TARGET = hello

all: $(TARGET)

$(TARGET): $(OBJFILES)
	$(CC) $(CFLAGS) -o $(TARGET) $(OBJFILES) $(LDFLAGS)

run: $(TARGET)
	./$(TARGET)

clean:
	rm -f $(OBJFILES) $(TARGET) *~
-
The OBJFILES variable holds a list of .o files that need to be created by the makefile from .c source files.
-
The TARGET variable specifies the name of the executable to build.
-
all builds the target
-
$(TARGET): $(OBJFILES) specifies how the target depends on the object files and how to build the target.
-
run depends on target and runs the target (the client)
-
clean removes the files make creates
We will test the makefile down the road. Leave it for now and move on to the fun stuff - writing code.
Write the Code
It’s time to write hello.c. As a reminder, here is what we said the code needed to do:
- Declare some variables
- Open a connection to the X Window Server
- Open a window
- Set some hints
- Display the window
- Handle events
- Close the Display
Let’s use this as an outline for our hello.c file
/*
 * hello.c - a simple x window client built on xlib
 *   modified 20230131 wds
 */

#include <stdio.h>      // for fprintf
#include <stdlib.h>     // for exit
#include <X11/Xlib.h>   // for xlib stuff

int main(int argc, char** argv)
{
	/*
	 * 1. Declare variables
	*/

    /*
	 * 2. Connect to the X window server
	*/

	/*
	 * 3. Open a window
	*/

    /*
	 * 4. Set some hints
	*/

    /*
	 * 5. Display the window
	*/

    /*
	 * 6. Handle events
	*/


    /*
	 * 7. Close the Display
	*/

	return 0;
}
Save the file as hello.c
Xlib related additions
- Xlib.h - a header file that brings in X.h and defines a bunch of things we will need for doing xlib programming - definitions and such.
Now that we have written the basic outline of our code, let’s build it and run it to check on the steps completed so far:
make run
makefile:13: *** missing separator.  Stop.
Yikes! If you see something like this, don't panic. It is probably just a case of tabs getting converted to spaces during cut and paste. make is picky, it only respects tab indent. So, delete any spaces and use a tab for indentation.
Lesson learned, don’t use spaces to indent makefiles… ever. Let’s use tabs and try it again.
make
cc -I/opt/local/include   -c -o hello.o hello.c
cc -I/opt/local/include -o hello hello.o -L/opt/local/lib -lX11
Ok. No errors this time, let’s go ahead and run it:
make run
./hello
Hopefully we didn’t get any more errors! Moving forward we will combine the build and run steps using make run:
make run
cc -I/opt/local/include   -c -o hello.o hello.c
cc -I/opt/local/include -o hello hello.o -L/opt/local/lib -lX11
./hello
If you like, you can save copies of the makefile and hello.c along the way for comparison.
This code doesn’t really do anything useful yet… other than proving that the makefile ‘works’ and that the code doesn’t have any show stopping bugs, and that we’re able to run it, and, and… Ha! What we have accomplished so far isn’t insignificant, but read on for more interesting development.
X programming can be pretty complicated, so one convention we are going to adopt and love starting now, is commenting the code and organizing it rationally. In this example, we are going to stretch things just a little bit in that we will keep our code contained in a single file. It won’t be long before you will want to split things up, but not this time, and this is where the use of comments will start to prove super helpful.
First revision - add variable declarations
In this first revision, we are going to go ahead and declare some variables and put those declarations at the top of our main function. As will become usual, we will build and run the result, before going on to the next revision. It used to be the norm to put declarations at the top of a scope so that things would be easy to find. These days it’s a mix of folks putting them at the top and putting them closer to where they are used. We’re going to use the old-school approach for now.
Add this code into the Declare variables section just below main:
	/*
	 * 1. Declare variables
	*/

    // display vars
	Display* display;
	int screen;
	Window root;
	GC gc;

	// window vars
	Window window;
	Visual* visual = CopyFromParent;
	int x, y, width, height;
    char *message = "hello, world - click the mouse or press any key to exit.";

	// event loop - done and event variables
	int done = 0;
	XEvent event;
Let’s talk about the variable declarations and definitions that were added and what they are used for since they seem to be important (appearing first).
The first four variables, display, screen, root, and gc, refer respectively to the logical display (remember this is the coalescence of all of your monitors), the screen (think of this as one of your monitors), the root window, and the graphic context. The root window and graphic context are new, we haven’t discussed them before. But, basically, the root window is the blank window taking up your whole screen where everything that appears, appears. All windows have a parent, and the parent window of your applications is the root window. The graphic context is related to our drawing text to the window. display is a pointer to a Display structure containing all sorts of information about the display. We will pass the pointer around a lot and if we need some of that information, we will pass it to information returning macros, but otherwise, it just is. screen is an integer that tells us which screen to use in a multi-screen environment. root is a Window structure that contains information about a window. We pass it around and provide it when asked for it. gc is a GC, it is needed to draw stuff. We need access to these variables to instantiate windows, work with windows, and the like.
The next set of variables, window, visual, x, y, width, height, and message refer to our window, it’s visual style (GrayScale, TrueColor, etc). it’s location and size, and the message we intend to display. window is a Window, visual is set to CopyFromParent so that the style is inherited from the root window, x, y, width, and height are integers, and message is a string.
The last two, done and event refer to a control variable for our loop and a structure to hold inbound events that is used for handling events in the event loop. event is an XEvent, a structure containing information about an event.
We will expand the variables section along the way as we need to by adding additional declarations and definitions.
Xlib related additions
- Display - A giant struct containing information about our display
- Window - The ID of our window
- GC - A giant structure containing information about a graphics context
- Visual - a structure containing information about the color environment
- XEvent - a structure (a union of all the event types) containing information about events
- CopyFromParent - a macro
Now that we have added a section of code, let’s build and run our program to test what we have done so far.
Build and run:
make run
cc -I/opt/local/include   -c -o hello.o hello.c
cc -I/opt/local/include -o hello hello.o -L/opt/local/lib -lX11
./hello
It didn’t break, but it doesn’t do much either. Let’s revise it.
Second revision - Open a connection ot the X Window Server
The code we add in this revision will open the display, give us the index of our screen, give us a handle to the root window, and give us a graphic context.
	/*
	 * 2. Connect to the X window server
	*/

	display = XOpenDisplay((char*) NULL);
	if(display == (Display *) NULL) {
		fprintf(stderr, "Unable to connect to X server [%s]\n",
			XDisplayName((char*) NULL));
		exit(1);
	}

	screen = DefaultScreen(display);
	root = RootWindow(display, screen);
	gc = DefaultGC(display, screen);
Xlib related additions
- XOpenDisplay - a function that opens the display
- XDisplayName - a macro that returns the display name
- Default Screen - a macro that returns the index of the default screen
- RootWindow - a macro that returns the id of the root window
- DefaultGC - a macro that returns the default graphic context of the screen
Let’s build it and check in on our progress towards a working client.
Build and run:
make run
cc -I/opt/local/include   -c -o hello.o hello.c
cc -I/opt/local/include -o hello hello.o -L/opt/local/lib -lX11

make run
./hello
Well, that’s all well and good. It looks like we were able to build it and run it, so… in theory we sucessfully connected to the X server… but, we will just make sure by displaying some information about the display we got back.
To do this, we will create a function to print information about the display to the terminal window where we run the client.
We will first add in a prototype for our function above main:
void PrintDisplayInformation(Display* display, int screen);

int main(int argc, char** argv)
Like most xlib calls ours will take a display and screen as arguments. Then we will add the body of our function after main returns:
    return 0;
}

void PrintDisplayInformation(Display* display, int screen) {
	int screen_num, display_width, display_height, width, height;

	/* get screen size from display structure macro */
	screen_num = DefaultScreen(display);
	display_width = DisplayWidth(display, screen_num);
	display_height = DisplayHeight(display, screen_num);

	fprintf(stderr, "DisplayString: %s\n", DisplayString(display));
	fprintf(stderr, "default screen index: %d\n", screen_num);
	fprintf(stderr, "display width: %d\n", display_width);
	fprintf(stderr, "display height: %d\n", display_height);
}
The function just uses some macros from xlib to get information about the display and prints out the results.
Next, we will make the call to our function after our previous revision’s change to open a connection:
    gc = DefaultGC(display, screen); // prior stuff, don't re-add
    PrintDisplayInformation(display, screen);
What all of this does is pretty self evident, but we have introduced some new xlib calls. With an open display, we can see what connect string was used to connect to the X server, the screen number of the default screen, and the width and height of the display.
Xlib related additions
- DisplayWidth - a macro that returns the width of the screen
- DisplayHeight - a macro that returns the height of the screen
- DisplayString - the display string that was used to connect to the X server
The code now actually does something useful, let’s test.
Build and run:
make run
cc -I/opt/local/include   -c -o hello.o hello.c
cc -I/opt/local/include -o hello hello.o -L/opt/local/lib -lX11
./hello
DisplayString: /private/tmp/com.apple.launchd.HJrIk6bvEG/org.xquartz:0
default screen index: 0
display width: 2560
display height: 1440
Woohoo! Some real work.
You should notice that the display string was not specified programmatically. This is because when you don’t it defaults to whatever $DISPLAY is set to by the environment. Use echo $DISPLAY to see its value (make sure you are either in a Terminal locally, in an xterm remotely, ssh -Y’d into an environment, etc. If you aren’t the $DISPLAY variable is likely unset).
Third Revision - Open a window
Now let’s get a window set up to display. The first part of setting up a window is to open it on the display (this doesn’t mean that it will actually show up, but it’s getting close).
Let’s create a variable to hold the width of our window’s border. Add it to the window vars section of the code:
int border_width = 2;
Let’s add some code between the window vars and event loop sections that relate to our window’s background and border pixels and to the events we are interested in receiving:
	// window attributes
	//   subscribe to events (Exposure, ButtonPress, and KeyPress), set bg and fg pixels
	XSetWindowAttributes attributes;
	unsigned long attribute_mask = CWEventMask | CWBackPixel | CWBorderPixel;
	unsigned long event_mask = ExposureMask | ButtonPressMask | KeyPressMask;
Then, let’s add code in section 3, that uses those properties and a few others to properly create a window:
	/*
	 * 3. Open a window
	*/

	// open a window in the top left corner that is 150 pixels from either edge
	// that is 500x100 pixels in size
	// subscribe the window to events, and set the border and background pixels
	x = y = 150;
	width = 500;
	height = 100;
	attributes.event_mask = event_mask;
	attributes.border_pixel = BlackPixel(display, screen),
	attributes.background_pixel = WhitePixel(display, screen);

	window = XCreateWindow( display, root, x, y, width, height,
		border_width, CopyFromParent, InputOutput,
		visual, attribute_mask, &attributes);
Xlib related additions
- XSetWindowAttributes - a function to modify a set of window attributes
- CWEventMask - a bit mask that indicates we have set event attributes
- CWBackPixel - a bit mask that indicates we have set a background pixel
- CWBorderPixel - a bit mask that indicates we have set a border pixel
- ExposureMask - a bit mask that indicates we want to receive Exposure events
- ButtonPressMask - a bit mask that indicates we want to receive ButtonPress events
- KeyPressMask - a bit mask that indicates we want to receive KeyPress events
It’s a good time to test the build again.
Build and run:
make run
cc -I/opt/local/include   -c -o hello.o hello.c
cc -I/opt/local/include -o hello hello.o -L/opt/local/lib -lX11
./hello
DisplayString: /private/tmp/com.apple.launchd.HJrIk6bvEG/org.xquartz:0
default screen index: 0
display width: 2560
display height: 1440
With the window created, we just need to pass some hints to the window manager and we’ll be able to display the window… on the screen!
Fourth Revision - Set some hints
In this revision, we will set window manager hints so that the window manager properly sizes and displays our window. As the name suggests, these are hint and may be ignored, but we want to provide them anyway, just in case!
To give our code access to size hint structures and such, we will need to include the xlib utilities header file Xutil.h. Add this to the end of the includes section.
#include <X11/Xutil.h> // for XSizeHints etc.
Classes in X Windows parlance are used to differentiate between different kinds of applications for the purpose of allowing similar applications to share properties. There may be other uses, but I don’t know what they are. In our case, we will just put our client into an example_class, where it won’t disturb other clients. If you actually were to build a suite of related clients, you would probably want to give it a descriptive and unique name that could be shared by your clients but that wouldn’t clash with others.
Put this declaration and definition into the window vars section:
` char *application_class = “example_class”; `
We will also add some variable related to hints, put these after the window vars section and before the event loop vars:
	// window hints - size, name, class, and window manager hints
	XSizeHints size_hints;
	char *window_name;
	XClassHint class_hints;
	XWMHints window_manager_hints;
Let’s set hints for the size and position of our window, the name of our window, and some window manager specif information. Put this code in the fourth section:
	/*
	 * 4. Set some hints
	*/

	size_hints.x = x;
	size_hints.y = y;
	size_hints.width = width;
	size_hints.height = height;
	size_hints.min_width = width;
	size_hints.min_height = height;
	size_hints.base_width = width;
	size_hints.base_height = height;
	size_hints.flags = USPosition | USSize | PMinSize | PBaseSize;
	window_name = argv[0];
	class_hints.res_class = application_class;
	class_hints.res_name = window_name;
	window_manager_hints.flags = InputHint | StateHint;
	window_manager_hints.initial_state = NormalState;
	window_manager_hints.input = True;

	XSetWMNormalHints(display, window, &size_hints);
	XStoreName(display, window, window_name);
	XSetClassHint(display, window, &class_hints);
	XSetWMHints(display, window, &window_manager_hints);
Xlib related additions
- Xutil.h - a header file that adds some xlib utilities and defines
- XSizeHints - a struct containing size hint information for the window manager
- XClassHint - a struct containing class information for the window manager
- XWMHints - a struct containing window manager hints
- USPosition - a flag indicating that the user provided the position value
- USSize - a flag indicating that the user provided the size value
- PMinSize - a flag indicating that the program provided the minimum size value
- PBaseSize - a flag indicating that the program provided the base size value
- InputHint - a flag indicating the style of input preferred (pointer follows focus, etc)
- StateHint - a flag indicating the preferred starting style of the window (iconified, normal)
- NormalState - a flag indicating the normal window state (open not maximized)
- XSetWMNormalHints - a function to set the window manager normal hints
- XStoreName - a function to store (set) the window name
- XSetClassHint - a function to set the class hint
- XSetWMHints - a function to set the wm hints
This gets us closer to actually seeing somethign in a window - we have one and its properties are set. It’s ready to display. In the meantime, another test.
Build and run:
make run
cc -I/opt/local/include   -c -o hello.o hello.c
cc -I/opt/local/include -o hello hello.o -L/opt/local/lib -lX11
./hello
DisplayString: /private/tmp/com.apple.launchd.HJrIk6bvEG/org.xquartz:0
default screen index: 0
display width: 2560
display height: 1440
Fifth revision - Display the window
Now that the window has been opened and its hints set, it’s a breeze to actually get it to appear. Add some code to section 5:
	/*
	 * 5. Display the window (Raise it and flush the output queue)
	*/

	XMapRaised(display, window);
	XFlush(display);
Xlib related additions
- XMapRaised - a function that maps our window to the screen and allows it to be drawn
- XFlush - a function to flush the output queue and cause our window to receive events
This will display the window and flush the output queue so that the window gets drawn. Unfortunately it appears so quickly and disappears so quickly you likely won’t see much. Let’s try it anyway.
Build and run:
make run
cc -I/opt/local/include   -c -o hello.o hello.c
cc -I/opt/local/include -o hello hello.o -L/opt/local/lib -lX11
./hello
DisplayString: /private/tmp/com.apple.launchd.HJrIk6bvEG/org.xquartz:0
default screen index: 0
display width: 2560
display height: 1440
To get it to stay longer, we will need to do some more work - the event handler, up next is just what is needed here.
Sixth revision - Handle Events
We are nearly there. Just a this revison and the next and our client will be complete. In this revision we will actually get to see our handiwork and it will seem to be complete, but the last revision will be needed so hang in there.
We are going to be calling strlen, so another include is needed. Add it after the last includde:
#include <string.h>
The event loop is where all of the program action takes place. In our world, it’s where the window gets populated and drawn and where we respond to events. Let’s add the event handler code in section 6.
    /*
	 * 6. Handle events
	*/

	while(! done) {
		XNextEvent(display, &event);
		if(event.type == Expose) {
            XDrawString(display, window, gc, 50, 50, message, strlen(message));
			printf("For Expose event the area is:\n");
			printf("\tAt %d, %d,", event.xexpose.x, event.xexpose.y);
			printf(" %d pixels wide, %d high\n", event.xexpose.width,
				event.xexpose.height);
		}
		else if(event.type == ButtonPress) {
			printf("Button pressed\n");
			done = 1;
		}
		else if(event.type == KeyPress) {
			printf("Key pressed\n");
			done = 1;
		}
	}
This code just loops until we say it’s done - basically when we get a ButtonPress event, or a Keypress event. With compositing (a fancy, modern invention), we won’t get a lot of Expose events, contrary to practically every book ever written on X, but will get one when we startup and resize the window, so all we do is draw our string into the window and print some information to the standard error that we can see.
Xlib related additions
- XNextEvent - a function that waits for an event to occur (yes it blocks, deal with it)
- Expose - - a flag indicating that an Expose event has been received
- XDrawString - a function that draws a string into a window
- ButtonPress - a flag indicating that a ButtonPress event has been received
- KeyPress - a flag indicating that a KeyPress event has been received
When you run it this time, you will see the glorious window appear. You can click inside the window, or press a key when the window has the focus to exit.
Run it and see.
Build and run:
make run
cc -I/opt/local/include   -c -o hello.o hello.c
cc -I/opt/local/include -o hello hello.o -L/opt/local/lib -lX11
./hello
DisplayString: /private/tmp/com.apple.launchd.HJrIk6bvEG/org.xquartz:0
default screen index: 0
display width: 2560
display height: 1440
For Expose event the area is:
	At 0, 0, 500 pixels wide, 100 high
 For Expose event the area is:
	At 0, 0, 500 pixels wide, 100 high
Button pressed
Here’s what you should see:
Do what it says :).
Seventh and final revision - Close the Display
Even though the client is pretty much finished and works as advertised, the polite way of ending the life of a client is to free up any dynamic structures and close the display. In our case, we just need to close the display
Add the code to section 7:
    /*
	 * 7. Close the Display
	*/

	XCloseDisplay(display);
Xlib related additions
- XCloseDisplay - a function that closes the display
Let’s run it again and admire our work.
Build and run:
make run
./hello
DisplayString: /private/tmp/com.apple.launchd.HJrIk6bvEG/org.xquartz:0
default screen index: 0
display width: 2560
display height: 1440
For Expose event the area is:
	At 0, 0, 500 pixels wide, 100 high
For Expose event the area is:
	At 0, 0, 500 pixels wide, 100 high
Key pressed
It should still look good:
Here is the result of all of our labor - 2 files, makefile and hello.c:
makefile
CC = cc
CFLAGS = -I/opt/local/include
LDFLAGS = -L/opt/local/lib -lX11
OBJFILES = hello.o
TARGET = hello

all: $(TARGET)

$(TARGET): $(OBJFILES)
	$(CC) $(CFLAGS) -o $(TARGET) $(OBJFILES) $(LDFLAGS)

run: $(TARGET)
	./$(TARGET)

clean:
	rm -f $(OBJFILES) $(TARGET) *~
hello.c
/*
 * hello.c - a simple x window client built on xlib
 *   modified 20230131 wds
 */

#include <stdio.h>      // for fprintf
#include <stdlib.h>     // for exit
#include <X11/Xlib.h>   // for xlib stuff
#include <X11/Xutil.h>  // for XSizeHints etc.
#include <string.h>

void PrintDisplayInformation(Display* display, int screen);

int main(int argc, char** argv)
{
	/*
	 * 1. Declare variables
	*/

    // display vars
	Display* display;
	int screen;
	Window root;
	GC gc;

	// window vars
	Window window;
	Visual* visual = CopyFromParent;
	int x, y, width, height;
    char *message = "hello, world - click the mouse or press any key to exit.";
	int border_width = 2;
	char *application_class = "example_class";
	// window attributes
	//   subscribe to events (Exposure, ButtonPress, and KeyPress), set bg and fg pixels
	XSetWindowAttributes attributes;
	unsigned long attribute_mask = CWEventMask | CWBackPixel | CWBorderPixel;
	unsigned long event_mask = ExposureMask | ButtonPressMask | KeyPressMask;

	// window hints - size, name, class, and window manager hints
	XSizeHints size_hints;
	char *window_name;
	XClassHint class_hints;
	XWMHints window_manager_hints;

	// event loop - done and event variables
	int done = 0;
	XEvent event;

    /*
	 * 2. Connect to the X window server
	*/

	display = XOpenDisplay((char*) NULL);
	if(display == (Display *) NULL) {
		fprintf(stderr, "Unable to connect to X server [%s]\n",
			XDisplayName((char*) NULL));
		exit(1);
	}

	screen = DefaultScreen(display);
	root = RootWindow(display, screen);
	gc = DefaultGC(display, screen);

	PrintDisplayInformation(display, screen);

	/*
	 * 3. Open a window
	*/

	// open a window in the top left corner that is 150 pixels from either edge
	// that is 500x100 pixels in size
	// subscribe the window to events, and set the border and background pixels
	x = y = 150;
	width = 500;
	height = 100;
	attributes.event_mask = event_mask;
	attributes.border_pixel = BlackPixel(display, screen),
	attributes.background_pixel = WhitePixel(display, screen);

	window = XCreateWindow( display, root, x, y, width, height,
		border_width, CopyFromParent, InputOutput,
		visual, attribute_mask, &attributes);

    /*
	 * 4. Set some hints
	*/

	size_hints.x = x;
	size_hints.y = y;
	size_hints.width = width;
	size_hints.height = height;
	size_hints.min_width = width;
	size_hints.min_height = height;
	size_hints.base_width = width;
	size_hints.base_height = height;
	size_hints.flags = USPosition | USSize | PMinSize | PBaseSize;
	window_name = argv[0];
	class_hints.res_class = application_class;
	class_hints.res_name = window_name;
	window_manager_hints.flags = InputHint | StateHint;
	window_manager_hints.initial_state = NormalState;
	window_manager_hints.input = True;

	XSetWMNormalHints(display, window, &size_hints);
	XStoreName(display, window, window_name);
	XSetClassHint(display, window, &class_hints);
	XSetWMHints(display, window, &window_manager_hints);

    /*
	 * 5. Display the window
	*/

	XMapRaised(display, window);
	XFlush(display);

    /*
	 * 6. Handle events
	*/

	while(! done) {
		XNextEvent(display, &event);
		if(event.type == Expose) {
            XDrawString(display, window, gc, 50, 50, message, strlen(message));
			printf("For Expose event the area is:\n");
			printf("\tAt %d, %d,", event.xexpose.x, event.xexpose.y);
			printf(" %d pixels wide, %d high\n", event.xexpose.width,
				event.xexpose.height);
		}
		else if(event.type == ButtonPress) {
			printf("Button pressed\n");
			done = 1;
		}
		else if(event.type == KeyPress) {
			printf("Key pressed\n");
			done = 1;
		}
	}

    /*
	 * 7. Close the Display
	*/

	XCloseDisplay(display);

	return 0;
}

void PrintDisplayInformation(Display* display, int screen) {
	int screen_num, display_width, display_height, width, height;


	/* get screen size from display structure macro */
	screen_num = DefaultScreen(display);
	display_width = DisplayWidth(display, screen_num);
	display_height = DisplayHeight(display, screen_num);

	fprintf(stderr, "DisplayString: %s\n", DisplayString(display));
	fprintf(stderr, "default screen index: %d\n", screen_num);
	fprintf(stderr, "display width: %d\n", display_width);
	fprintf(stderr, "display height: %d\n", display_height);
}
Clean up the mess
The makefile proves to be useful in this area. Just run make clean to get rid of the object files an executables and temp files that may have been generated:
make clean
rm -f hello.o hello *~

ls
hello.c		makefile
Of course, you may want to deploy your masterpiece before you go cleaning, right? If so, just copy it off into ~/bin or something so that it will always be available to you.
Wrapping up
Whew! We finished it and hopefully, you learned a lot along the way…
- How to find X
- How to find Xlib’s include files
- How to find Xlib’s libraries
- How to find the right compiler flags to build an xlib client
- How to find the right linker flags to build an xlib client
- How to find out which libraries are needed to build an xlib client
- How to write a decent makefile for building, running and cleaning up afterward
- How to write a client for X that displays a message and reacts to key presses and mouse clicks
- And various other things, I’m sure :)
Here are the Xlib things (macros, defines, functions, etc) that we used:
In order of presentation
- Xlib.h - a header file that brings in X.h and defines a bunch of things we will need for doing xlib programming - definitions and such.
- XOpenDisplay - a function that opens the display
- XDisplayName - a macro that returns the display name
- Default Screen - a macro that returns the index of the default screen
- RootWindow - a macro that returns the id of the root window
- DefaultGC - a macro that returns the default graphic context of the screen
- DisplayWidth - a macro that returns the width of the screen
- DisplayHeight - a macro that returns the height of the screen
- DisplayString - the display string that was used to connect to the X server
- XSetWindowAttributes - a function to modify a set of window attributes
- CWEventMask - a bit mask that indicates we have set event attributes
- CWBackPixel - a bit mask that indicates we have set a background pixel
- CWBorderPixel - a bit mask that indicates we have set a border pixel
- ExposureMask - a bit mask that indicates we want to receive Exposure events
- ButtonPressMask - a bit mask that indicates we want to receive ButtonPress events
- KeyPressMask - a bit mask that indicates we want to receive KeyPress events
- Xutil.h - a header file that adds some xlib utilities and defines
- XSizeHints - a struct containing size hint information for the window manager
- XClassHint - a struct containing class information for the window manager
- XWMHints - a struct containing window manager hints
- USPosition - a flag indicating that the user provided the position value
- USSize - a flag indicating that the user provided the size value
- PMinSize - a flag indicating that the program provided the minimum size value
- PBaseSize - a flag indicating that the program provided the base size value
- InputHint - a flag indicating the style of input preferred (pointer follows focus, etc)
- StateHint - a flag indicating the preferred starting style of the window (iconified, normal)
- NormalState - a flag indicating the normal window state (open not maximized)
- XSetWMNormalHints - a function to set the window manager normal hints
- XStoreName - a function to store (set) the window name
- XSetClassHint - a function to set the class hint
- XSetWMHints - a function to set the wm hints
- XMapRaised - a function that maps our window to the screen and allows it to be drawn
- XFlush - a function to flush the output queue and cause our window to receive events
- XNextEvent - a function that waits for an event to occur (yes it blocks, deal with it)
- Expose - - a flag indicating that an Expose event has been received
- XDrawString - a function that draws a string into a window
- ButtonPress - a flag indicating that a ButtonPress event has been received
- KeyPress - a flag indicating that a KeyPress event has been received
- XCloseDisplay - a function that closes the display
In alphabetical order
- ButtonPress - a flag indicating that a ButtonPress event has been received
- ButtonPressMask - a bit mask that indicates we want to receive ButtonPress events
- CWBackPixel - a bit mask that indicates we have set a background pixel
- CWBorderPixel - a bit mask that indicates we have set a border pixel
- CWEventMask - a bit mask that indicates we have set event attributes
- Default Screen - a macro that returns the index of the default screen
- DefaultGC - a macro that returns the default graphic context of the screen
- DisplayHeight - a macro that returns the height of the screen
- DisplayString - the display string that was used to connect to the X server
- DisplayWidth - a macro that returns the width of the screen
- Expose - - a flag indicating that an Expose event has been received
- ExposureMask - a bit mask that indicates we want to receive Exposure events
- InputHint - a flag indicating the style of input preferred (pointer follows focus, etc)
- KeyPress - a flag indicating that a KeyPress event has been received
- KeyPressMask - a bit mask that indicates we want to receive KeyPress events
- NormalState - a flag indicating the normal window state (open not maximized)
- PBaseSize - a flag indicating that the program provided the base size value
- PMinSize - a flag indicating that the program provided the minimum size value
- RootWindow - a macro that returns the id of the root window
- StateHint - a flag indicating the preferred starting style of the window (iconified, normal)
- USPosition - a flag indicating that the user provided the position value
- USSize - a flag indicating that the user provided the size value
- XClassHint - a struct containing class information for the window manager
- XCloseDisplay - a function that closes the display
- XDisplayName - a macro that returns the display name
- XDrawString - a function that draws a string into a window
- XFlush - a function to flush the output queue and cause our window to receive events
- Xlib.h - a header file that brings in X.h and defines a bunch of things we will need for doing xlib programming - definitions and such.
- XMapRaised - a function that maps our window to the screen and allows it to be drawn
- XNextEvent - a function that waits for an event to occur (yes it blocks, deal with it)
- XOpenDisplay - a function that opens the display
- XSetClassHint - a function to set the class hint
- XSetWindowAttributes - a function to modify a set of window attributes
- XSetWMHints - a function to set the wm hints
- XSetWMNormalHints - a function to set the window manager normal hints
- XSizeHints - a struct containing size hint information for the window manager
- XStoreName - a function to store (set) the window name
- Xutil.h - a header file that adds some xlib utilities and defines
- XWMHints - a struct containing window manager hints
All of these are described in great detail in the Xlib Reference Manual (Vol. 2 of O’Reilly’s Definitive Guides to the X Window System) cited at the top of the note.
Here’s the link to the source code for the program developed in the note. It is available here
Reach out to me if you find any issues or have suggestions.
- will
post last updated 2023-01-23 12:13:00 -0600